Showing posts with label Pretty Little Ribbon Shop. Show all posts

Monday, 5 November 2012

Pretty Little Ribbon Shop DT - Die Cuts/Punches, Ribbon and Charms and a DT Call!!!

 Woohoo!!!  It is time for another challenge at The Pretty Little Ribbon Shop and this month our theme is die cuts/punches, ribbons and charms.  First though I'd like to tell you about the DT call Sarah is holding on the blog.  She's looking for two members to join the team so if you love working with ribbons (and who doesn't?!?!) then why not apply?  All the details are here and good luck if you apply!  Back to my card, which I'm sorry to say is also my last card for the team.  I've inked up another of the gorgeous stamps from the Christmas Story collection and made an unusual shaped card using the bit leftover when you make a 15cm square card from A4!!  I have so many of these bits left over and am starting to use them up like this!
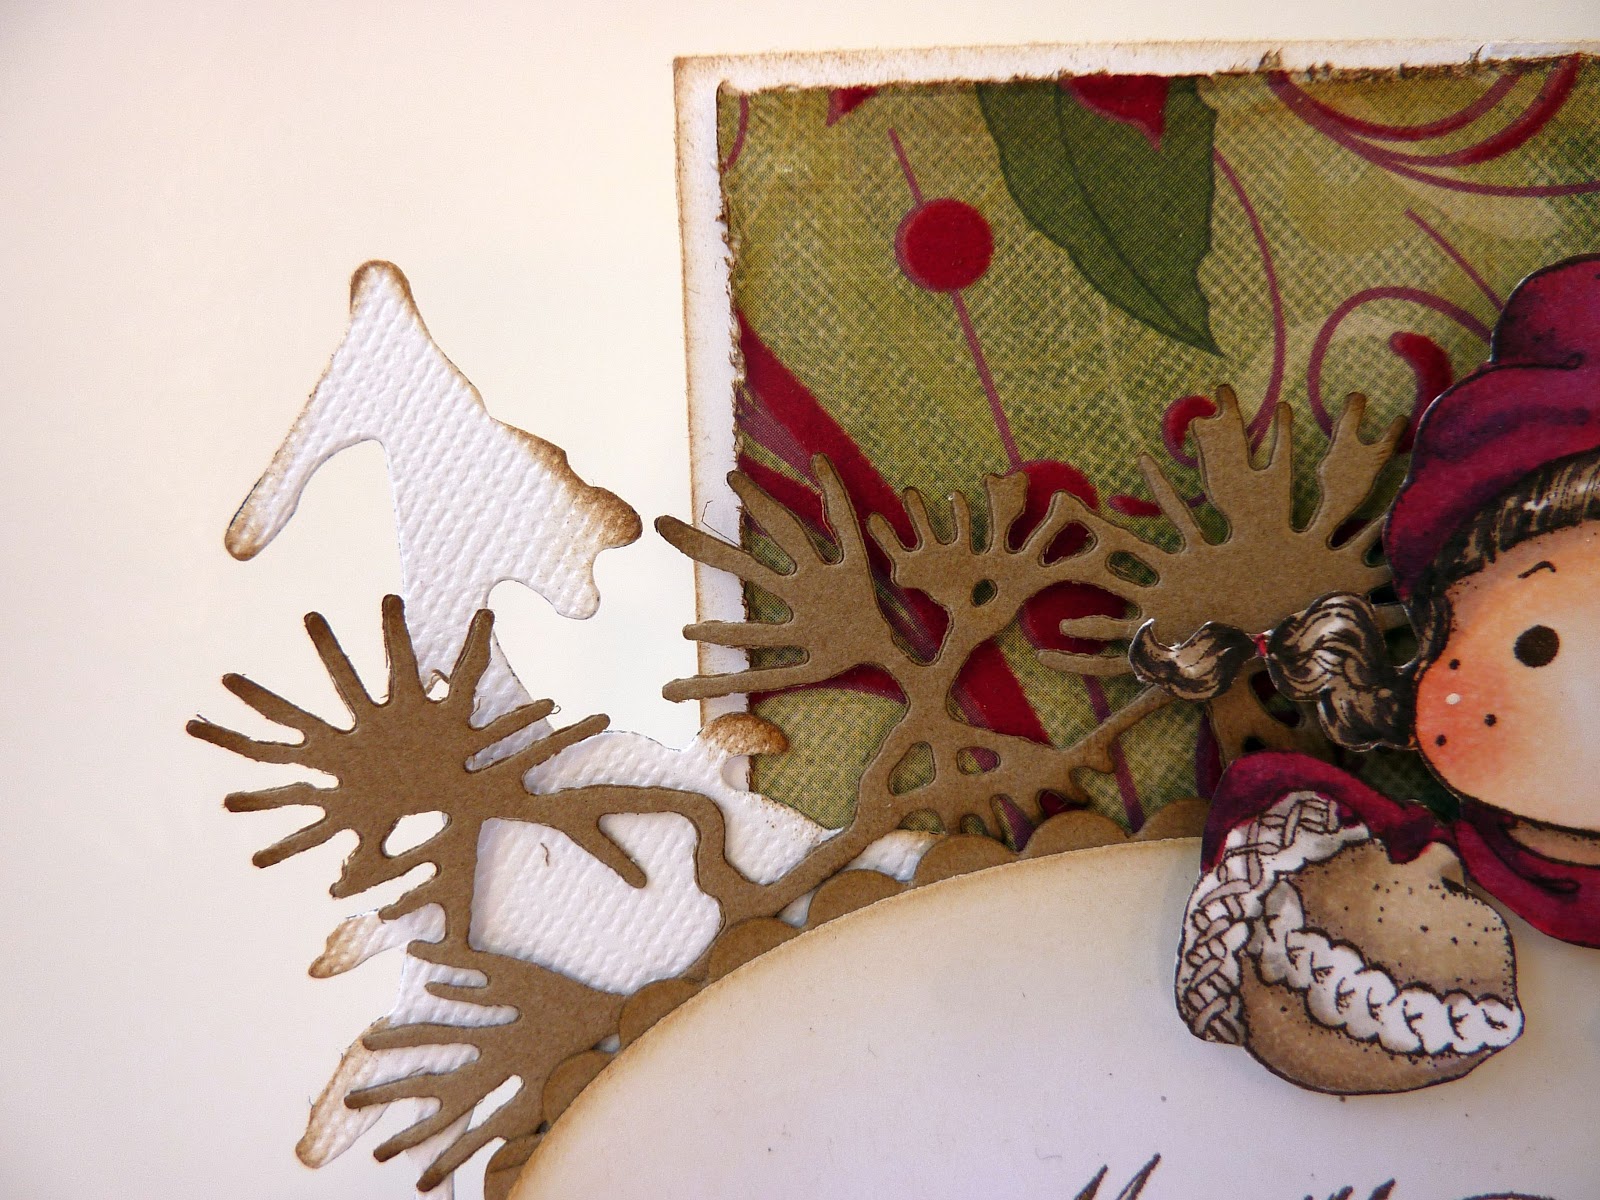
 So, this is Tilda with Lovikkamittens #337 and I've coloured her with copics.
 I have stamped the A Merry Christmas text #702 and although it wasn't embossing ink I stamped with, I have sprinkled it with embossing powder and heat embossed.  This gives a sprinkling of embossing rather than the whole text, which I think looks rather nice!
 The gorgeous ribbon is, of course, from The Pretty Little Ribbon Shop as is the charm (which I have coloured with a copic) and the snowflake (which I have cut from a length of snowflake ribbon).
 I have used the Tim Holtz Pine Tree die and also part of the Tim Holtz festive greenery die at one side of the card.
 On the other side I've used Tim Holtz Snow Flurry on the edge die.
I hope you like it and I've inspired you to join us this month at The Pretty Little Ribbon Shop!  Pop over to the blog to see the rest of the team's stunning creations!  Thanks for looking! x

Monday, 1 October 2012

Pretty Little Ribbon Shop DT - Autumn Colours

 Woohoo!!!  It is time for another challenge at Pretty Little Ribbon Shop and this month our theme is Autumn Colours!  Perfect for any halloween projects you might have in the making!  I have wanted to create a layout of some picture from last year's Halloween for a while now and when Webster's Pages released their Once Upon A Halloween collection they were perfect for the job!!!  All the papers are by Webster's Pages except the base which is by MME.  I am entering my layout into the Webster's Pages challenge for September which is to mix and match their collections - I've actually used papers and embellishments from five of their collections!
 The fabulous spooky crooked house was cut from some Webster's Pages paper and I cut a scalloped paper from their Sunday Picnic collection to create the purple "clouds/mist" around the house.
 The moon was cut from another Webster's Pages paper and the bats were stamped with a stamp from the new Whiff of Joy Happy Halloweeen stamp set, and the spider charm is from Whiff of Joy too.  The tree was cut with Tim Holtz branch tree die.
 The pumpkin and gravestone sentiment were cut from Webster's Pages and the fabulous teapot pin was a gift.  I added some "cobweb" with my glue gun -  you know all those annoying thin strands you get when you glue things?? well on this occasion they were actually really useful!
 I have created the flower with some gorgeous silk crush ribbon from The Pretty Little Ribbon Shop - I adore this ribbon - it is one of my favourites and comes in a great choice of colours!  The silver netting is from Webster's Pages - I thought it looked like cobwebs, and the centre is a Prima pebble.
 The gorgeous black lace is Webster's Pages and again I've used more fussy cut elements from the Once Upon a Halloween collection.
 Love the zig zag owl and the "booooo-tiful" on this sentiment!
 I added a cute pumpkin charm from Pretty Little Ribbon Shop to my son's skeleton hand to look like he's carrying a lantern.
 The fluffy roses are from Webster's Pages and I added gems from my stash to the spikes on top of the house.  There's some more of the gorgeous silk crush ribbon peeping out from behind the owl!
I hope you like my layout and I've inspired you to join us this month at The Pretty Little Ribbon Shop challenge!  Pop over to the blog to see the rest of the team's stunning creations!  Thanks for looking! x

Monday, 3 September 2012

Pretty Little Ribbon Shop DT - Pearls and Lace


Woohoo!!  It is time for another challenge at The Pretty Little Ribbon Shop and this month our theme is Pearls and Lace - always a great combination!!  I created a door or wall hanger for my good friend Louise's new baby girl, Ella!  The base is a wooden heart from The Hobby House and I covered it with some Claudine Helmuth Sticky Back Canvas and painted the edges with gesso.
 I have stamped the gorgeous Tilda Blowing Hearts onto the canvas and coloured her with copics.  I love the effect this gives - almost ilke a cross stitch!  I added some stickles to her wings and lace trims and white dots to her cheeks with a gel pen.
 I made a flower from felt using a doohickey peony die and added a button from my stash along with some twine from The Pretty Little Ribbon Shop.  The crochet flowers are from The Hobby House.
 The gorgeous daisy lace around the edge is from The Pretty Little Ribbon Shop as are the pearls.  The butterfly is from the Hobby House, painted with gesso.
 The felt letters and tassle are from my stash.
I hope you like it and I've inspired you to join us this month at The Pretty Little Ribbon Shop Challenge!  Pop over to the blog to see the rest of the team's stunning creations - as always they will blow you away!  Thanks for looking! x

Monday, 6 August 2012

Pretty Little Ribbon Shop DT - Add Some Bling!

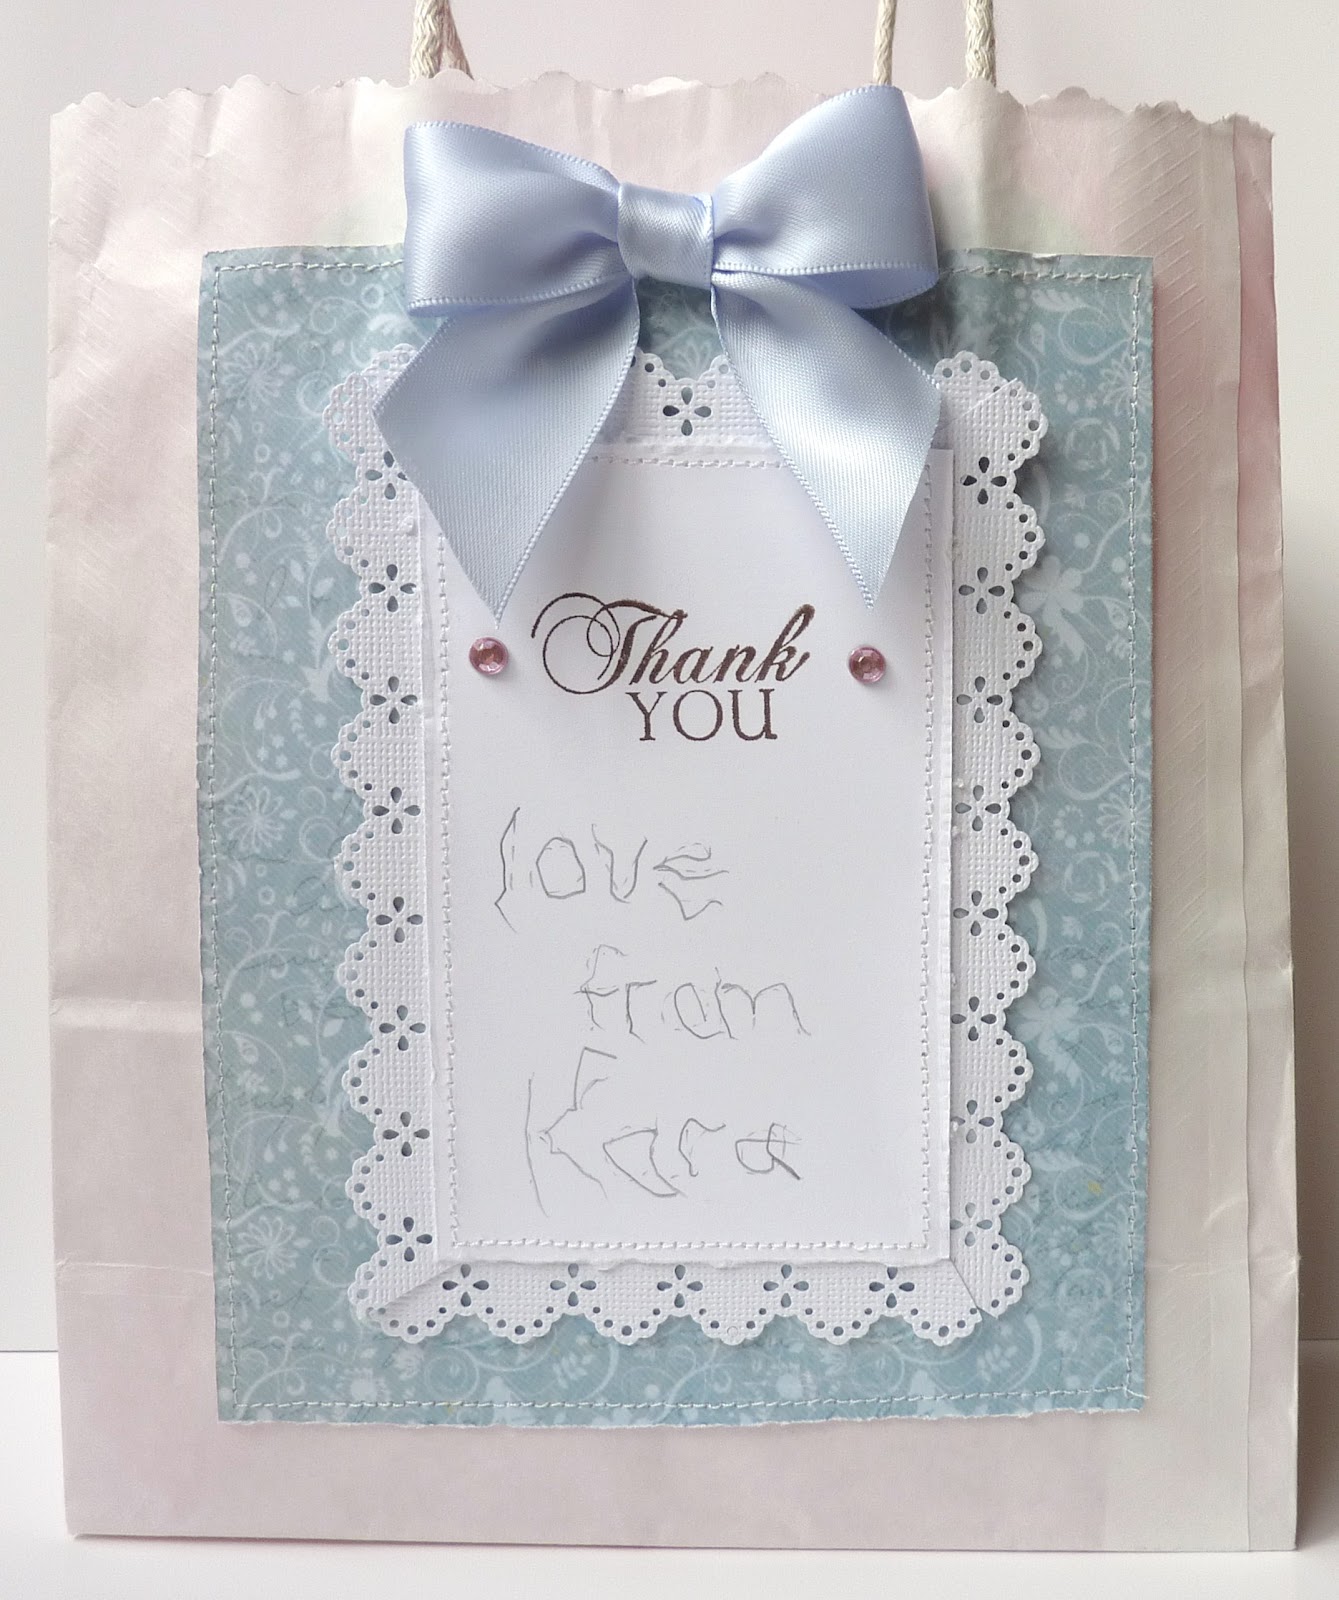
Woohoo!!!  It is time for another challenge at the Pretty Little Ribbon Shop and this month our theme is to add some bling!!  I created this gift bag back in July as a thank you gift for a little girl.  The gift bag base was created from a prescription bag.  Unfortunately now that my little girl has diabetes we bring home rather large bags from the chemists every few weeks and I decided to save them to see if they would turn into gift bags OK and I'm glad I did as it worked really well!!!  I cut the top from the bag with some fancy scissors which created a nice scalloped edge to the top of the bag!  The handles I'd saved from an old gift bag and added them to the inside of the prescription bag.  I've covered the bag with an unknown paper from my stash and the centre panel is a Melissa Francis paper from my gorgeous friend Louise!
As this gift was from my little girl I just had to use Tilda with a Gift For you #283 as she just is my Kara with her curly hair!  I've coloured her with copics and added stickles to the gift and her shoes.
I added a selection of flowers from my stash and also a flower charm tied with twine from The Pretty Little Ribbon Shop.
I added my sparkle in the form of some gorgeous pink gems from The Pretty Little Ribbon Shop.
The gorgeous pale blue satin ribbon is from The Pretty Little Ribbon Shop too - it ties beautifully!
I decorated the back of the bag with the same paper as the front and simply added another bow and a panel for Kara to write on.
The bag contained some headbands.  The back flower one is a bought one and the other two I bought cheaply and decorated them with more ribbons from The Pretty Little Ribbon Shop.
One with a ribbon rose like the one I made for Kara a while back.....
..... and the other one wrapped in ribbon and a matching rolled flower topped with dewdrops.
I hope you like them and I've inspired you to add some bling with us at Pretty Little Ribbon Shop!  Pop over to the blog to see the rest of the team's stunning creations!  Thanks for looking! x

Monday, 2 July 2012

Pretty Little Ribbon Shop DT - Tags!

 Woohoo!! It is time for another challenge at The Pretty Little Ribbon Shop and this month Peet has chosen our challenge which is to make a tag or add a tag to your project!!  I have made a criss cross card to house a recipe card to give to my Sister-in-Law!  We had a barbecue a while back (probably the last sunny day way back whenever it was!!) and I made a strawberry and cream cheesecake which went down a storm!  My Sister-in-Law asked for the recipe so I thought I'd make a keepsake card for it rather than just jot it down on some paper!  The papers are from Prima's Botanical paper pad and I have sewn the edges and inked them with walnut stain distress ink.
 I coloured Strawberry Yummy Tilda #338 with copics (link is to the mini, but I have used the full sized version of her).
 I added some summery looking flowers from my stash along with some leaves cut with the rose leaf doohickey die.  I have used a Martha Stewart punch along the edges of the criss cross sections.
  You will find my tutorial for creating the large aida flower on the Whiff of Joy World of Ideas blog here.
 The absolutely scrumptious ribbon is from the Pretty Little Ribbon Shop and is the 38mm silk crush - my favourite of all ribbons!!!  I also added a strawberry charm from my stash and a tag cut with the doohickey vintage tag die #1.  I have hand written the recipe title with a calligraphy pen.
I hope you like it and I've inspired you to join us at The Pretty Little Ribbon Shop!  Pop over to the blog to see the rest of the team's stunning creations and the gorgeous prize up for grabs!  Thanks for looking! x

Monday, 4 June 2012

Pretty Little Ribbon Shop DT - June Challenge - Layers!

 Woohoo!!  I hope you're having a fabulous extra long weekend to celebrate the Diamond Jubilee!!  It is time for another fabulous challenge over at The Pretty Little Ribbon Shop and this month our theme has been chosen by Sasha, and it is Layers.  I had great fun creating this layout of my gorgeous little girl dressed in my summer straw hat and winter scarf!  She loves to dress up and I just happened to catch her in this adorable pose!!  I am entering my layout into Webster's Pages Girly Challenge which is to create a layout along the theme "why I love being a girl".  I started with a plain white cardstock and after creating some brickwork with gesso, a mask and tattered rose distress ink I added lots of gorgeous elements cut from Webster's Pages Country Estate "Breezeway" paper.  The gothic looking window was just perfect for her to peep out of!!
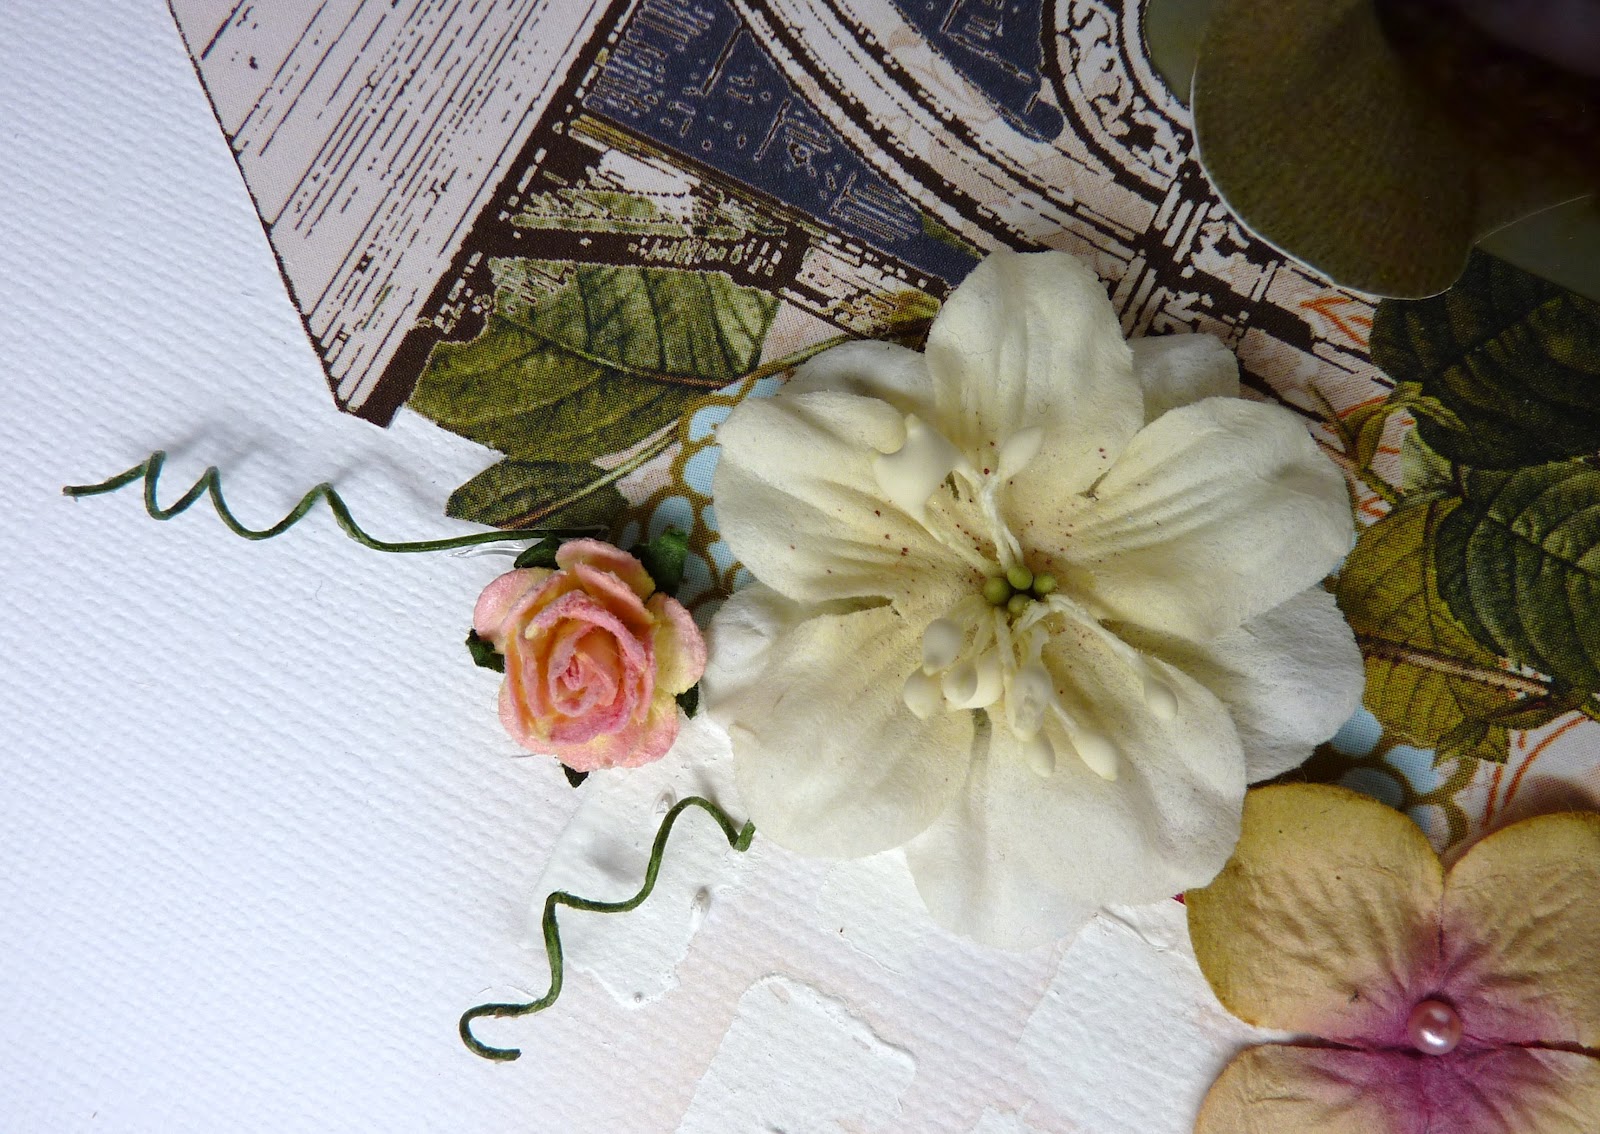
 I cut around her hat a little bit so that I could have it in front of the window frame.  I have added some flowers here and there among the fussy cut ones for extra dimension.
 I added a little window sill using some cardstock punched with a Martha Stewart punch.  The gorgeous butterfly was cut from Webster's Pages too.
 I created the little sentiment tags myself on the computer and the absolutely gorgeous cameo is from Webster's Pages as is the sparkler just underneath it.  The brad in the centre of the flower is from Whiff of Joy.
 The gorgeous crisp white satin ribbon is from The Pretty Little Ribbon Shop and the stunning lace is from Webster's Pages.  I had a bit of a disaster when I was creating my layout - Sarah sent me the cutest coat hanger charm that I wanted to add to go with the dressing up theme and I knocked it off my desk with my elbow - could I find it?? - no.  I must have spent around two hours tearing my desk and room apart to no avail.  I think my craft room has a warp hole somewhere as things seem to disappear like this all the time - tell me I'm not the only one this happens too lol!?  Anway, enough rambling and back to the layout.  For another layer I also added some cheesecloth that subtly merges over the lace.
 I'm really pleased how the wall turned out - it was my first time using gesso and the mask and I think it is going to be a regular feature on my layouts - just love it!!
 I added some twiddly bits created from the waste flower stems to add a bit of softness to the harsh line of the window.
 In this photo above you can see how I have raised each layer of fussy cutting onto foam pads to give the layout extra interest.
I hope you like it and I've inspired you to join us this month at The Pretty Little Ribbon Shop!  Pop over to the blog to see the absolutely gorgeous creations from the rest of my team mates!!  Thanks for looking! x

Monday, 7 May 2012

The Pretty Little Ribbon Shop DT - Blooms and Butterflies

 Woohoo!!  It is time for another challenge at The Pretty Little Ribbon Shop and this month it was my turn to choose the challenge theme, which is Blooms and Butterflies - well, I had to pick my most favourite thing, butterflies, didn't I!?  I am so, so pleased how this layout turned out.  I really wanted to try some of the gorgeous fussy cutting ideas I've seen on Webster's Pages blog - and guess what!?!?!  My layout was chosen to be a featured photo on the Webster's Pages Inspire Me website!!  Woohoo!!  I am just so thrilled about that because, as my followers will know, I am relatively new to creating scrapbook layouts so it was such an honor!!!  I started with a white piece of cardstock and got all brave and added some paint detailing with Broken China distress stain before adding my papers.
 The photo is myself, my hubby and my two children all dressed up for my Brother's evening wedding reception last year!
 I have used some gorgeous lilac tulle and turquoise stitched grosgrain from The Pretty Little Ribbon Shop to create a trim along the bottom of the layout.  I pleated the tulle before adding the ribbon.  The pearls and butterfly charm are also from The Pretty Little Ribbon Shop.  The butterfly charm was silver by the way, I have stained it with alcohol ink.  The flowers are Prima except the small rose and the sentiment tag is from Webster's Pages.
 The background of my photo of my two little cherubs was not great so I thought I'd try cutting them out.  I've nestled them among some bird cages which I fussy cut from some Webster's Pages - I love how it turned out!  The twine that Kara is "holding" is from The Pretty Little Ribbon Shop too.
 I created the flower myself with some more of the lilac tulle and a bead from my stash.  The gorgeous papers are from Webster's Pages' new Sunday Picnic collection.
 The amazingly gorgeous cameo is from Webster's Pages too - I adore these!  I've mounted it onto some oval nesties to make it stand out more.
 I used a Tattered Angels mask and glimmer mist to create the pink detailing at the corner of the photo and the butterflies were all cut from Webster's Pages too.
 The twine loops along and off the page for a bit of fun.
 The gorgeous lily is by Prima and I added two more butterflies cut from the Webster's Pages.
 The alpha stickers are from Webster's Pages too (can you tell I'm a little obsessed with Webster's Pages lol??).
I hope you like it and I've inspired you to join us this month at The Pretty Little Ribbon Shop!  Pop over to the blog to see the rest of the gorgeous creations from my team mates!  Thanks for looking! x