
Thursday, 30 June 2011
Thank you x
Just a quick post, I wanted to thank you all for your supportive and caring comments yesterday. It is lovely to know people are there during sad times and I really appreciate every single comment x
Wednesday, 29 June 2011
I made it so I'm showing it

Today's card was for a challenge blog which sadly it appears I'm no longer a part of due to reasons I can't actually fathom out myself right now. As I took a lot of time and effort making it, as I always do, I thought I'd still share it with you anyway.
 The gorgeous image is from a Penny Black set, Garden Friends. I have coloured with copics.
 I added some flowers from my stash along with some doohickey die leaves. The gorgeous cream flower is by Prima. The butterfly border was punched with a Martha Stewart punch and so was the butterfly.
 I added some ribbon from my stash and some more flowers on the other side of the image. The large paper flower was made with a doohickey die.
 I hope you like it and thanks for looking! x
Tuesday, 28 June 2011
Introducing..............
Introducing......
On Saturday 9 July we will kick of this amazing new adventure with our first challenge. Each fortnight we will post a new sketch challenge for you to play along with and some fantastic sponsors as well.
We would love to see what you create for using our sketch each fortnight. All crafty creations are welcome, be it a card, a scrapbook layout, an off the page creation - whatever you can come up with, just use the sketch and be crafty!
The Design Team is working hard behind the scenes so that our first challenge on Saturday 9 July will be full of amazing inspiration for you.
Do some of these faces look familiar??? Check out the Pink {INK} Sketch Challenges blog to find out more info and to meet our amazing team.

The countdown is ON! See you there on the 9th!
Saturday, 25 June 2011
You are a winner!!!!
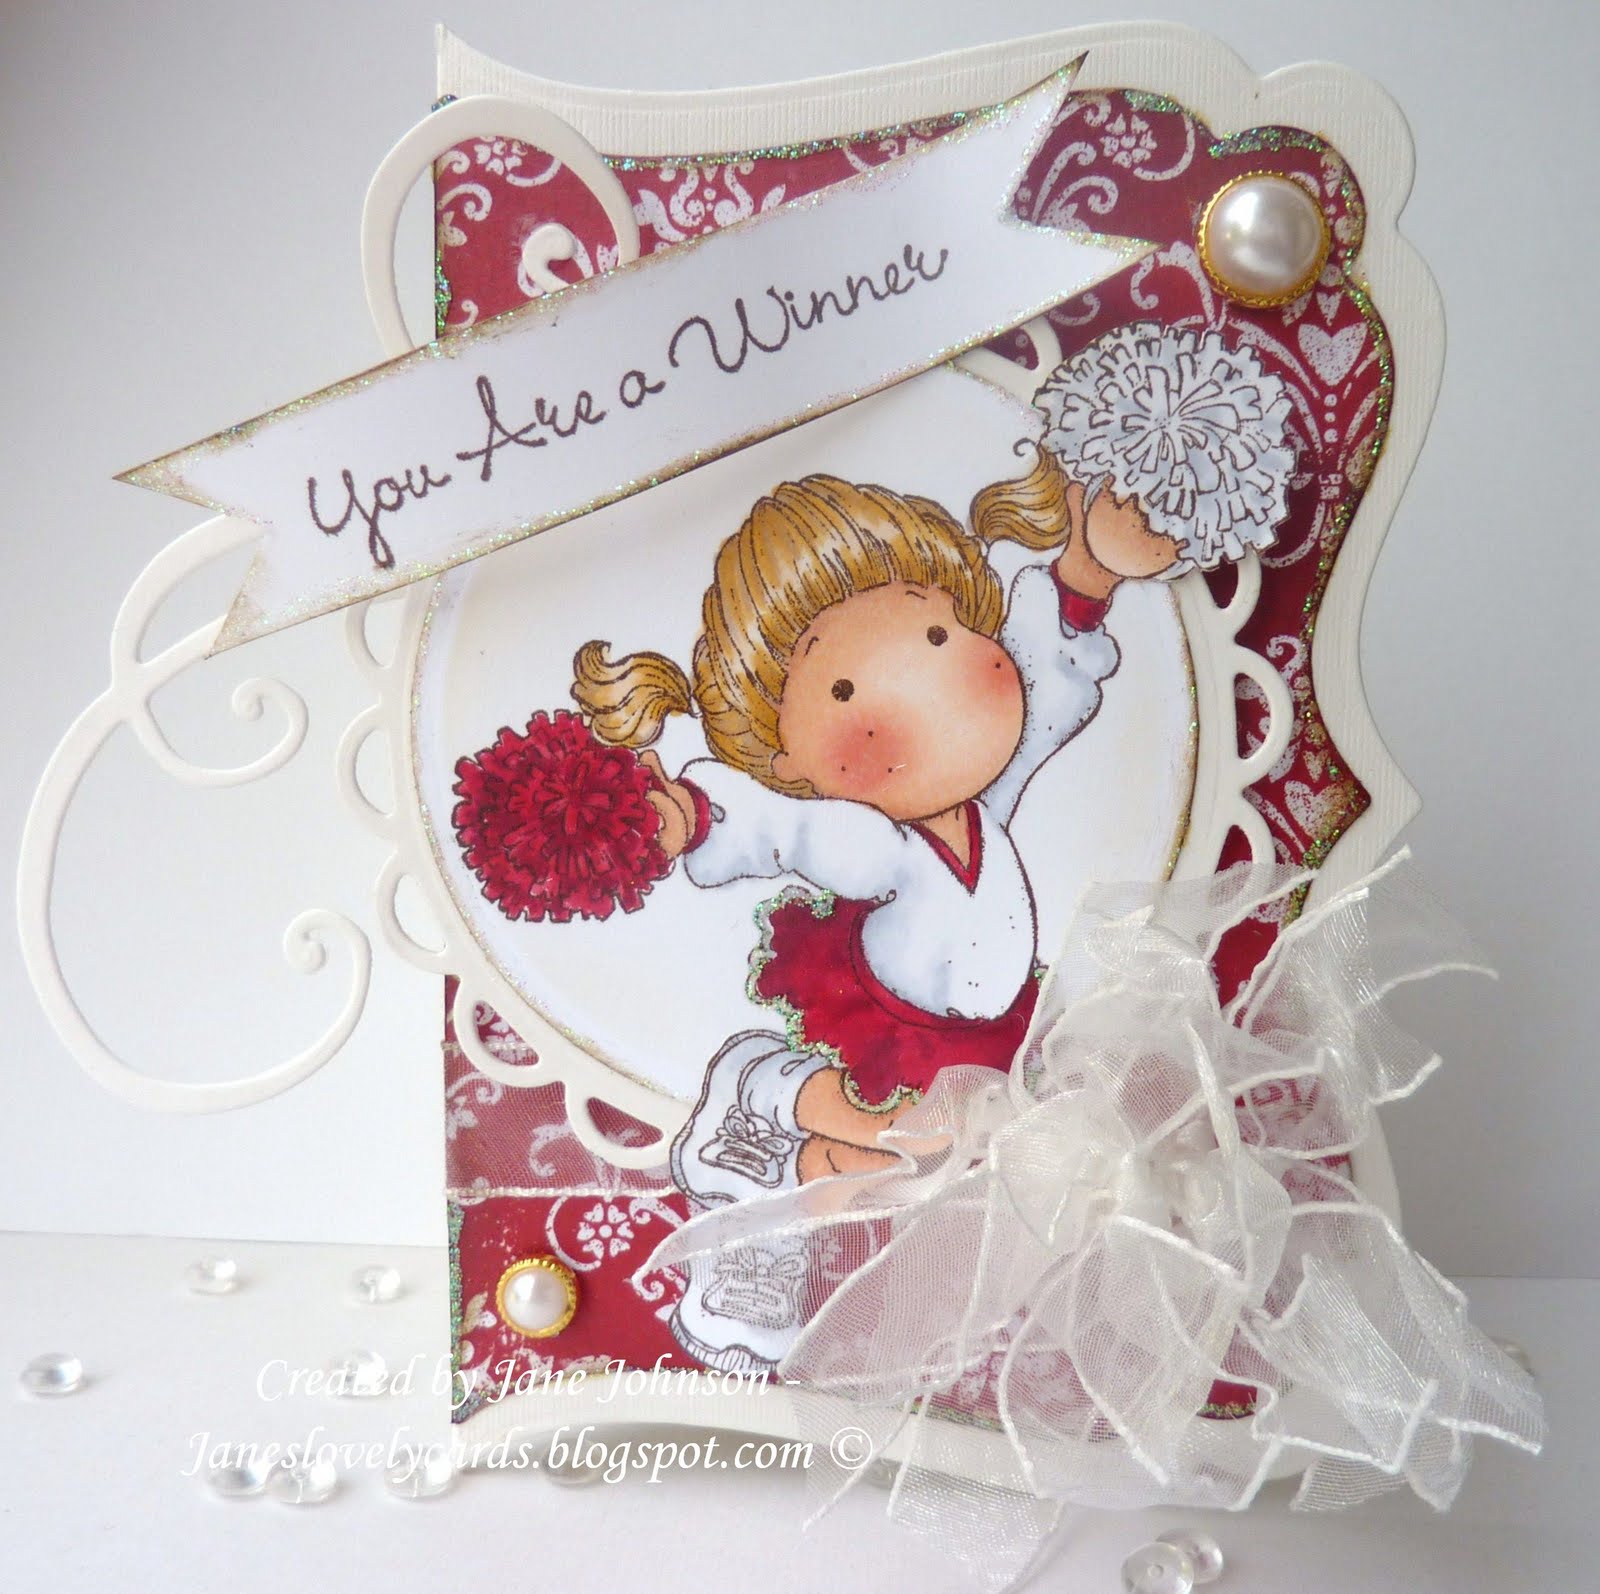 Yippee!! I found time to play with my Magnolia summer kit last night!! (well, actually I made time as I couldn't resist any longer LOL!). I just had to ink up the gorgeous cheerleader Tilda first - she's so cute!! I made the shape for my card with a go create die and I've used Magnolia papers inked with walnut stain distress ink. I am entering my card into the Stamp Something challenge of 4th July/Celebrations.
 I've coloured Tilda with copics and added a touch of stickles to the white trim on her skirt. The brads in the corners are from Whiff of Joy.
 I thought a ribbon blossom would be perfect with this image to represent one of her pompoms!!
 I cut the sentiment strip at each end to look like a banner and have stickled around the edges. The swirl was cut with a doohickey die.
 Hope you like it and thanks for looking! x
PS: I have a full summer kit for sale as due to an error at the checkout I ended up ordering two - doh!!! If you are interested please email me - address in the side bar x
Whiff of Joy's tribute to a legend!!

I have a surprise one image release to share with you today from Whiff of Joy!!! It is the sad anniversary of the legendary Michael Jackson's untimely death today and in tribute Katharina has released this stunning Henry Mouse Michael Jackson image by Alison Acton. He is available as a black and white digi or precoloured digi as of today! I have used a mix of scraps from my stash for my card.
 I coloured Henry/Michael with copics and added stickles to his jacket - gutted it has made the black jacket look all green :S.
 This sentiment from Tickled Pink Stamps just had to be used with this image don't you think!! So perfect! The stars were cut with a sizzix die and that's really all there is to say about this one!!

You can get your hands on your own Henry as Michael Jackson here. Hope you like it and thanks for looking! x
I coloured Henry/Michael with copics and added stickles to his jacket - gutted it has made the black jacket look all green :S.This sentiment from Tickled Pink Stamps just had to be used with this image don't you think!! So perfect! The stars were cut with a sizzix die and that's really all there is to say about this one!!You can get your hands on your own Henry as Michael Jackson here. Hope you like it and thanks for looking! x
Friday, 24 June 2011
Just Magnolia and hAnglar & sTanglar Challenge DT -

Woohoo!! Friday and time for another challenge at Just Magnolia and hAnglar & sTanglar! Our theme this week is butterflies. I have altered a glass jar to turn it into a pot to hold my paper stumps. I keep thinking "I must buy a pot to put them in" and I was washing the recycling (washing rubbish is so crazy LOL!!) when I thought "why buy I'll make one!"

 I covered the jar with gorgeous Pink Paislee papers and distressed the edges with walnut stain distress ink and stickles. The gorgeous lace around the top is from my stash and hides the screw top part of the jar. I added some leaves cut with the rose leaf doohickey die and some flowers from my stash.
 Here are a couple more butterflies to fit the challenge theme - the little clip with the butterfly on is by Pink Paislee too.
 Hope you like it and I've inspired you to join us this week at Just Magnolia and hAnglar & sTanglar challenge! Pop over to the blog to see the rest of the teams gorgeous butterfly creations. Thanks for looking! x
I coloured Tilda with Prismacolor pencils seeing as the pot is for my paper stumps :). I threaded the twine through a wooden flower button painted with crackle paint.
 I covered the jar with gorgeous Pink Paislee papers and distressed the edges with walnut stain distress ink and stickles. The gorgeous lace around the top is from my stash and hides the screw top part of the jar. I added some leaves cut with the rose leaf doohickey die and some flowers from my stash.
 Here are a couple more butterflies to fit the challenge theme - the little clip with the butterfly on is by Pink Paislee too.
 Hope you like it and I've inspired you to join us this week at Just Magnolia and hAnglar & sTanglar challenge! Pop over to the blog to see the rest of the teams gorgeous butterfly creations. Thanks for looking! x
Wednesday, 22 June 2011
Whiff of Joy Challenge DT - Michele's sketch and a tutorial
 It is time for another Whiff of Joy Challenge and this fortnight we have the most gorgeous sketch by Michele to follow! Thanks hun, I absolutely adore this sketch!!! I have used papers from MME's La Paperie stack distressed with walnut stain distress ink and stickles.
 I have used the oh so cute Henry with Love Balloon and coloured him with copics. I added a touch of stickles to the balloon.
 I added some flowers, ribbon and a button from my stash and some Whiff of Joy pearls. The large rose here and the small one on the tag I made myself using punches - if you would like to know how to make them please check out my tutorial on the Whiff of Joy Inspirations blog :). The heart border was cut with a Whiff of Joy die.
 I used the gorgeous Sweet tag with hearts die from Whiff of Joy to create my tags to slide behind the image. The lace is from my stash.
 The tags pull out for a hidden message!
 Hope you like it and I've inspired you to join us this fortnight at Whiff of Joy challenge! Pop over to the challenge blog to see the rest of the team's stunning cards! Thanks for looking! x
Simon Says Stamps challenge DT - My sketch
Woohoo!! It is time for another Simon Says Stamp challenge and this week it is a sketch by me!!

 I used the sketch to create a Father's Day card for my Father in Law using some gorgeous papers by Bo Bunny.
 I distressed all the edges with walnut stain distress ink and stickles.
 I coloured Edwin wainting for fish with copics and added a touch of stickles to the water.
 I created the letter tiles with Tim Holtz vintage market die and some kraft cardstock tiles. The sentiment is from Whiff of joy and the "tusk" and string is recycled from a straw hat LOL!
 I hope you like it and I've inspired you to join us this week at Simon Says Stamps challenge. Pop over to the blog to see the rest of the team's gorgeous creations! Thanks for looking! x
As always we are sponsored by our lovely boss Heidi with a whopping $50 credit voucher for the Simon Says Stamp store!!!
I used the sketch to create a Father's Day card for my Father in Law using some gorgeous papers by Bo Bunny. I distressed all the edges with walnut stain distress ink and stickles.
 I coloured Edwin wainting for fish with copics and added a touch of stickles to the water.
 I created the letter tiles with Tim Holtz vintage market die and some kraft cardstock tiles. The sentiment is from Whiff of joy and the "tusk" and string is recycled from a straw hat LOL!
 I hope you like it and I've inspired you to join us this week at Simon Says Stamps challenge. Pop over to the blog to see the rest of the team's gorgeous creations! Thanks for looking! x
Tuesday, 21 June 2011
Deep Ocean Challenge and Tickled Pink Stamps DT - Flowers
 WOW! we had a fantastic response to our first Deep Ocean Challenge! The fortnight has flown by and it is time for challenge two, which is flowers. We are sponsored by Tickled Pink Stamps for this challenge so all the DT have used Tickled Pink Stamps on their cards. I have used the gorgeous Pinkette Lil Tom Boyz Bug Coraline and some gorgeous papers from Magnolia which are just perfect for her!
 I have coloured her with copics and added some glossy accents to her magnifying glass.
 I used Magnolia's heart swirl doohicky for the leafy swirls and added flowers from my stash along with some netting and buttons to reflect her bug net :).
 The hydrangea is by Prima - my last one and they don't make these anymore :( and the butterflies were punched with Martha Stewart Monarch butterfly punch. I have given them a coat of stickles and added tiny pearls from The Hobby House to their bodies.
 I hope you like it and I've inspired you to join us this fortnight at Deep Ocean Challenge. Check out the challenge blog to see the rest of the team's stunning creations! Thanks for looking! x
Monday, 20 June 2011
Bildmalarna
 Today I'd like to show you the last card in the little Bildmalarna collection I made for The Hobby House. I think this image is my favourite of the four - she is so adorable on her little tricycle!! The papers are by Prima and I have distressed the edges with walnut stain distress ink. Both the papers and stamp are available from The Hobby House.
I used one of my new nesties around the image mat and I have coloured the image with Prismacolor Pencils blended with Sansador. I've really happy with how this one turned out - my pencil colouring still seems to be a little hit and miss! I added a rhinestone to the buckle on her shoe!

I used one of my new nesties around the image mat and the gorgeous butterflies were cut from one of the sheets in the Prima pad. The rhinestones are from The Hobby House.

The cute wooden buttons and gorgeous striped ribbon are both from The Hobby House.

I hope you like it and thanks for looking! x
Saturday, 18 June 2011
Magnolia Down Under Challenge DT - Transparency
 Woohoo!! It is time for another challenge at Magnolia Down Under Challenge and this week we'd like you to use acetate on your creations!! I'm so excited to show you this card! It is the card I have made for my Brother and his new wife for their wedding! I'm not sure when to give it to them though: they married on Thursday in Italy so I didn't attend and their reception is two weeks after they come back so do I give it to them when they return or at the reception LOL??? Answers on a postcard please!!
 Here is another angle which shows the acetate front panel a little better. The idea was that I could then have tiny punched hearts as confetti floating down in front of the bride and groom! I just love making acetate cards - especially white stamping on them LOL! I have stamped around the edges of the acetate with Magnolia's New Years swirl using white stazon and in between the little bridesmaid and pageboy I have stamped the two hearts and banner stamp from the Magnolia Wedding collection.
 So, onto the details and first up is the sweet ribbon hair Tilda - I think she is my all time favourite now, superceding my last one LOL. I have coloured her with copics and added stickles to the bows in her hair and the ribbon on the gift. It is difficult to see in this photo but I have also added liquid pearls to the centre of the flower and given her some pearl shoe buttons with it too.
 Next up is Edwin. How gorgeous is this stamp!?!? I saw it on sale a couple of weeks ago for half price so snapped him up quick ready for this card! So glad I did, he is just adorable! Again, he is coloured with copics and I have given him some liquid pearl buttons on his shirt and also in the centre of the flower.
 All the die cut swirls and leaves were cut with doohickey dies from white pearlescent cardstock. The pin, chiffon flower and gorgeous butterfly are all from The Hobby House and the cream rose is from Wild Orchid Crafts. The butterfly was gold so I have painted it with a white acrylic dabber and given it some liquid pearl spots on the body.
 Another butterfly from The Hobby House above Tilda along with some mokre roses, a pin and pieces of a gorgeous Magnolia Crystal Garland courtesy of my lovely friend Debbie - thank you so much hun, I've been saving this for something special as I just couldn't bare to use it LOL! You can see in this photo also that I have added little liquid pearl dots to all the dots of the flourish stamping around the edges - it looks so effective!
 You can see the hearts image stamped onto the acetate clearer in this photo along with the little hearts of confetti which were waste from some tag die cuts I've used on the back of the card. The bride and groom have been coloured with copics too and I have added some stickles to her dress. The backing paper is from MME's La Paperie stack.
 On the back I've used the same paper and I have stamped the hearts and banner stamp again. I've coloured parts of it with copics and then added the date of their marriage freehand.
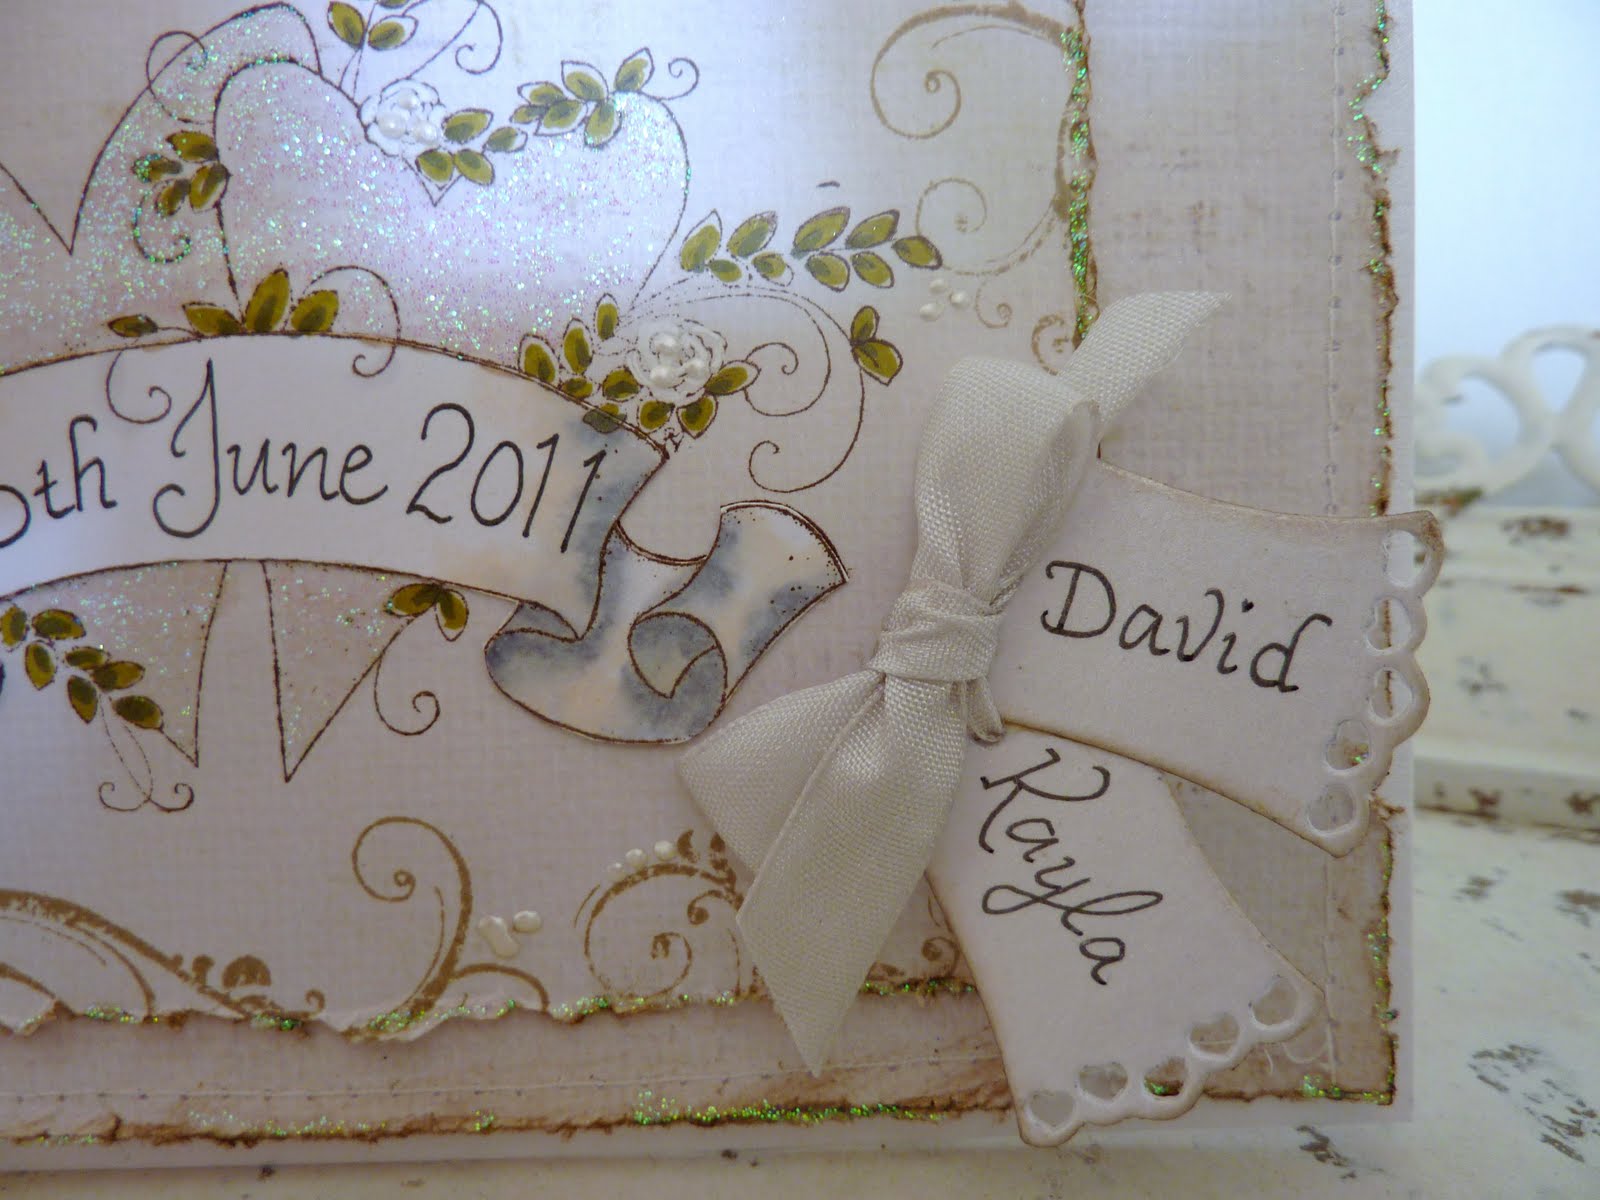 I used the cute little heart tags from Whiff of Joy to add their names and attached them with a bow.
 Inside the pocket are two tags cut with the larger Whiff of Joy heart tag die for messages. I added two as then my husband and I can write on one and the children can write on the other and that way they still get to write on the card without me having to make another especially for them LOL!
 I hope you like it and thank you for staying with me if you read all that!! Pop over to the challenge blog to see the rest of the team's stunning acetate creations - there are some amazing ideas! Hope you can join in and thanks for looking! x
Subscribe to:
Posts (Atom)