
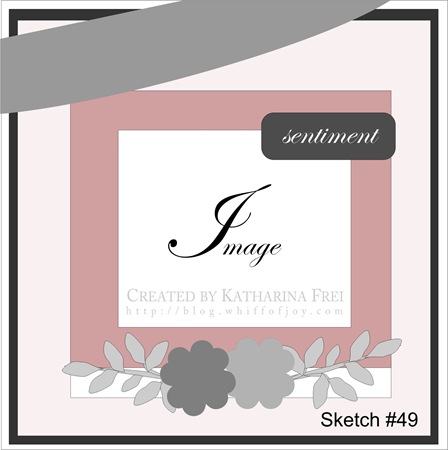
It is time for another Whiff of Joy Guest Designer call and this time Katharina has created a gorgeous sketch to follow. Why not have a go for a chance to join the Whiff of Joy team for two months?? Click here for further details. x


and finally.....my usual querky angle picture but what do you think of the picture below???

I found this gorgeous silk rose in my wardrobe last night and happened to put it down near my card and it looked so beautiful with it. Maybe I've found a new photo prop? Thanks for looking!
Image: Musing Melinda from Whiff of Joy coloured with copics
Paper: My Minds Eye
Flowers: Prima and Wild Orchid crafts
Pin: Tabbycrafts
Ribbon, lace and gems: from stash
Other tools: Stempelglede grunge stamps, antique linen distress ink, clear glitter glue


Here is my third entry for the Guest Designer call that Katharina is holding on her blog! It is also my first ever attempt at decorating a candle! Gosh you need nerves of steel to do this! It all came about because I bought my brother's girlfriend a special candle from our holiday and as it is such a tip in our house at the moment because of the building work I decided it would be safer being left in the car......well it melted into a horrible lump! I felt awful about it so had the idea I would make a replacement one for her!

I used the gorgeous Willow catching leaves stamp from the Whiff of Joy autumn collection, stamped and coloured on tissue paper, before melting it onto the candle. I also added some Prima hydrangeas and some gemstones.


I also stamped a Stempelglede flourish in Tattered Rose distress ink for the back of the candle, it isn't showing up very well in the photo unfortunately, next time I think I will use a darker ink!
For the gift box I made a tube of acetate and decorated it with Basic Grey Phoebe paper that I have punched with MS doiley lace punch to give it a pretty edge. For the tag I've used the same image as the candle, added a rectangle of the backing paper, again punched, some leaves and a little rose.


Around the base of the tube I have added lots of flowers, some punched from the backing paper with EK retro punches and some gorgeous mulberry paper roses. The large roses have been sprayed with glimmer mist.


On the top I added two roses, again sprayed with glimmer mist, a huge bow and a trail of punched leaves that just tumbles over the edge to a little flower. I'm pleased to say that she was thrilled with it and plans on keeping it in the box!
Image: Willow catching leaves from Whiff of Joy coloured with copics
Paper: Basic Grey Phoebe
Flowers: Wild Orchid crafts (roses), EK success retro flower punches
Leaves: Woodware punch
Ribbon and gems: from stash
Other tools: Stempelglede grunge flourish hearts collection, Tattered rose distress ink, MS doiley lace punch, heat gun

Today is my 9th wedding anniversary!! As it is also my birthday tomorrow we don't usually do anniversary gifts but I decided to get my lovely husband two bars of his favourite chocolate for putting up with me! So, last night I was busy making a wrap for them and went to get this gorgeous chocolatey paper especially. This is my second entry for Katharina's guest design team call that she is running on her blog. My husband's favourite chocolate is a certain brand of fruit and nut so I wanted the colours to reflect this, hence the rich chocolate colours and the use of Whiff of Joy's Fall Willow with Grapes stamp (the fruit in the fruit and nut LOL - tentative link I know) what am I like?

I stamped part of Willow and then masked her so that I could stamp one of my Stempelglede grunge hearts over the top, which I have then clear embossed. I then rubbed over the embossing with antique linen distress ink so that the lovely flourishes on the heart show up around Willow. I have then cut that heart out and mounted it onto a tag made with the reverse of the spotty paper. I have stamped another of the grunge heart stamps onto this embossed with gold.

I have added some doiley lace punched paper beneath the tag then added lots of embelllishments - a huge chiffon bow, trails of lace, a pearl headed pin, a flower and leaves (the leaves I have cut myself) and one of my favourite embellishments, curled wire, this time with "chocolate" buttons threaded onto it.


I have also attached two strips that I have embossed in gold with sentiments, both are from Whiff of Joy. I have distressed the edges with antique linen distress ink.

I have embossed a flourish from the Stempelglede grunge heart collection in several places on the backing paper and I have punched MS doiley lace punch along the edges before mounting the paper onto card.
I'm really pleased with how it turned out considering it was a last minute idea! A great way to "posh" up a little pressie!
Image: Willow from Whiff of Joy autumn kit, coloured with copics
Paper: Prima - Corina Nielsen Designs, Whisper Collection "secrets"
Flower: Prima and EK success retro flower punch
Buttons: Basic Grey
Wire, lace and ribbon: from stash
Other equipment: Stempelglede grunge flourish heart collection stamps, gold embossing powder, heat gun, clear embossing ink


I made a stairstep card and added a backing of acetate to give the impression that the leaves are floating on their own. I stamped Willow and then also stamped the leaves part of the stamp a few more times so that I could cut out the individual leaves.

I have also used the gorgeous stamp of Willow sitting with a loaf of bread and sat her on the middle step of the card.

I just love the large mushroom so had to use it, although it changed position many times and is now on the back step of the card with punched leaves around the base.

A view of the pumpkins on the front step. I have stamped a Stempelglede swirl stamp from the Grunge Hearts collection in various places on the backing paper. You can see some of it behind the pumpkins. I have also added some hand stitching in a zigzag and following the line of the stamped swirl and added a pearl to the end of one of the swirls. The lace has been distressed with antique linen distress ink as have all the edges of the backing paper which were torn instead of cut. On the back of each step I had added lengths of paper punched with my doiley lace punch.

On the front I have added a large flower made with retro punches. This has been made following Rach's fantastic tutorial here. I also made two smaller versions for elsewhere on the card.

Tucked in front of the mushroom is a removable tag to add a message on, which is shown removed and standing next to the card on this picture. The paper on the tag is the reverse of the orange backing paper. To give the card the autumnal forest feel I was after I made a large wire swirl and wound tiny white roses onto it and branches so that it looked like a rambling rose vine. I have also added a butterfly charm to it so that it. The wire ensemble has then been attached to the middle step.

A close up of the tag.....

The paper is the reverse of the orange paper. I added a little torn piece of doiley lace edged paper between the front and back papers of the tag and a couple of punched leaves and a rose.

....and the reverse of the tag ready for a message. I have stamped a Stempelglede grunge stamp around the edges with tea dye distress ink and the swirl in antique linen.

A view from the top so that you can see the different layers and steps better.

and finally, this is the card folded up ready for its envelope. x
Images: Whiff of Joy Autumn kit, coloured with copics
Paper: K & Co Madelaine collection
Flowers: White roses from Tabbycrafts, EK success retro flower punches from The Hobby House
Pearls, wire and lace: from stash
Charms: The Hobby House
Other tools: Distress inks in Tea Dye, Antique linen and Brushed cordoruy, MS branch punch, Woodware leaf punch, acetate